
If you are planning a refresh, this guide will walk you through how to replace bathroom vanity and sink without confusion. Backed by real-world remodeling experience at Poseidon Remodeling, this step-by-step approach is built for DIY homeowners, first-time remodelers, and anyone preparing a home for resale.
An outdated vanity can make an otherwise pleasing bathroom feel outdated and disjointed. From leaks or chipped surfaces to poor storage solutions or leaks seeping from underneath it, through leaky drains to poor plumbing, any one or all of these can make your entire bath feel disjointed and outdated! While many consider the job to be complicated or overwhelming, following some key steps makes this task manageable in just one weekend project.
Why Replace Your Bathroom Vanity and Sink?

Replacing a vanity is not just about looks. It solves real problems and improves daily use.
A proper bathroom vanity replacement guide focuses on both function and value. You may need to replace your vanity if:
- The cabinet is swollen or damaged from water
- The sink has cracks or persistent leaks
- Storage is not enough for your needs
- You want a modern upgrade for resale appeal
Many real estate investors use a DIY bathroom vanity and sink replacement to boost property value quickly. Even a small bathroom vanity replacement can change the entire space.
When to Call a Professional
Some situations require expert help:
- Major plumbing changes
- Structural wall damage
- Complex layouts
In these cases, working with experienced teams like Poseidon Remodeling ensures safe and lasting results.
You can also explore services like Bathroom Remodel in Oceanside for complete upgrades beyond DIY.
Tools and Materials You Will Need
Before you start how to replace bathroom vanity and sink, gather everything to avoid delays.
Basic tools:
- Adjustable wrench
- Screwdriver set
- Utility knife
- Level
- Measuring tape
- Bucket and towels
Materials:
- New vanity and sink
- Faucet and drain assembly
- Silicone caulk
- Plumbing tape
- Shims
Understanding your tools helps reduce mistakes during bathroom sink and vanity installation guide projects.
Choosing the Right Vanity Size and Style

One common mistake is buying the wrong size. Proper measuring is key when planning a step by step bathroom vanity replacement.
Measure Your Space Correctly
- Width of the current vanity
- Distance to walls and toilet
- Plumbing location
Choosing the right vanity size ensures smooth installation and avoids plumbing changes.
Pick the Right Style
Different layouts need different solutions:
- Single sink vanity installation works best for small spaces
- Double sink vanity replacement fits master bathrooms
- Floating vanities create a modern, open look
If you are aiming for resale, clean and simple designs work best. Many homeowners also explore modern bathroom vanity ideas to match current trends.
Step 1: Turn Off Water Supply
Before you begin how to remove a bathroom vanity, shut off the water.
- Turn off valves under the sink
- Open the faucet to release pressure
- Place a bucket under pipes
Skipping this step can lead to leaks and damage.
Step 2: Disconnect Plumbing
Now start the process of how to remove old bathroom vanity and sink safely.
- Unscrew water supply lines
- Disconnect the drain pipe
- Remove the P-trap
Take your time here. Plumbing connections for bathroom sink installation are sensitive and easy to damage.
For tricky plumbing setups, you can also explore helpful guides like The Easiest Way to Dig Up a Plumbing Pipe to better understand pipe access.
Step 3: Remove the Old Vanity
This is where the real transformation begins.
- Cut caulk around the vanity
- Remove screws from the wall
- Gently pull the vanity away
If the vanity is glued or stuck, move slowly to avoid wall damage. Many DIY homeowners struggle here, especially during replace bathroom vanity step by step projects.
Step 4: Prepare the Area
After removing the old unit, clean the space.
- Scrape off old caulk
- Repair wall damage
- Check for mold or water damage
A clean base is critical for installing new bathroom vanity properly.
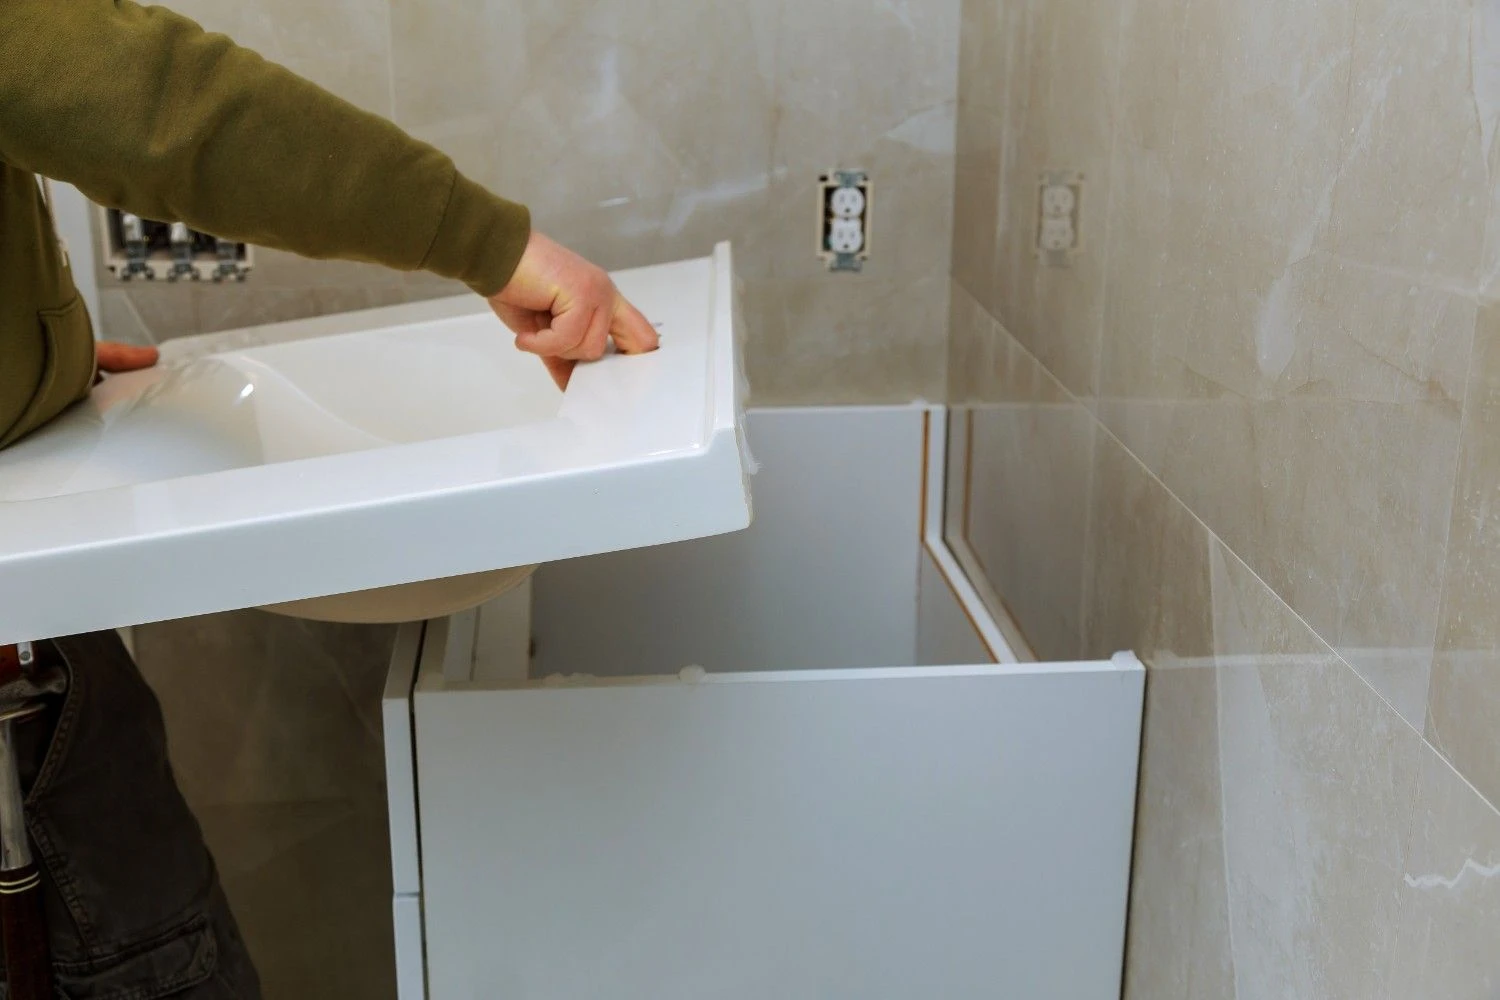
Step 5: Position the New Vanity
Place the vanity carefully in position.
- Align it with plumbing
- Use a level to ensure balance
- Add shims if needed
Proper leveling prevents long-term issues like uneven sinks or water pooling.
This step is key in any DIY bathroom vanity replacement cost and tools planning since mistakes here lead to costly fixes.
Step 6: Secure the Vanity to the Wall
Once aligned:
- Drill screws into wall studs
- Tighten securely but do not overtighten
This ensures your vanity stays stable for years.
Step 7: Install the Sink and Faucet
Now move to how to replace a bathroom sink.
- Attach faucet to sink before placing it
- Apply silicone around edges
- Set sink into place
Let the sealant cure before moving forward.
This part is often overlooked in many guides, but proper sealing is essential in bathroom sink and vanity installation guide projects.
Step 8: Reconnect Plumbing
Reconnect everything carefully.
- Attach water supply lines
- Reinstall P-trap
- Check for leaks
Turn the water back on slowly and test.
If you notice leaks, tighten connections or reapply plumbing tape.
Step 9: Seal and Finish
Apply caulk around edges for a clean look.
- Seal between wall and vanity
- Smooth caulk lines
- Clean excess material
This step completes the installing a new bathroom vanity and sink process.
Common Mistakes to Avoid
Even simple projects can go wrong. Here are mistakes to watch:
- Not measuring correctly
- Skipping leveling
- Overtightening plumbing connections
- Ignoring wall damage
Avoiding these issues ensures your replace bathroom sink project runs smoothly.
Cost Breakdown for DIY Vanity Replacement
Budget planning is of particular concern to homeowners and investors, particularly for vanity expenses which range between
- $150 to $800 for vanity costs.
- $100-400 per sink/faucet combination costs.
- Tools and materials cost: $50-150
DIY bathroom vanity and sink replacement can often be accomplished for under $1000 when properly planned and executed, providing homeowners who plan on selling soon an excellent return-on-investment.
Small Bathroom Vanity Replacement Tips
Working in tight spaces requires smart planning.
- Choose compact vanities
- Use wall-mounted options
- Focus on storage efficiency
These small bathroom vanity replacement tips help maximize both space and function.
If you are planning a full upgrade, consider exploring Luxury Bathroom Ideas to elevate your design.
Conculsion
Done correctly, replacing bathroom vanities will improve function, storage capacity and style at once, not forgetting safety considerations too! With this guide how to replace bathroom vanity and sink you have everything you need from start to finish, perfect if this is your first experience doing this work yourself.
If you need expert plumbing work or finish services for an elegant finish, consulting professionals could save time and reduce stress. While DIY techniques might work at first, most people turn. Contact us Poseidon Remodeling professionals instead to ensure their bathroom upgrade looks modernized over time.
FAQs
How long does it take to replace a bathroom vanity and sink?
Most DIY projects take 4 to 8 hours. First-time remodelers may need a full day, especially when learning how to replace bathroom vanity and sink step by step.
Can I replace a bathroom sink without replacing the vanity?
Yes, you can replace bathroom sink alone if the vanity is in good condition. Make sure the new sink fits the existing cutout and plumbing.
What is the hardest part of vanity replacement?
Removing the old unit and handling plumbing connections can be tricky. Many homeowners find how to remove a bathroom vanity the most challenging step.
Do I need a plumber for installing a new bathroom vanity?
Not always. DIY homeowners can handle installing new bathroom vanity if plumbing is simple. Complex setups may require professional help.
How do I choose the right vanity size?
Measure your space carefully and consider plumbing placement. Choosing the right vanity size is key to a smooth bathroom vanity replacement guide process.